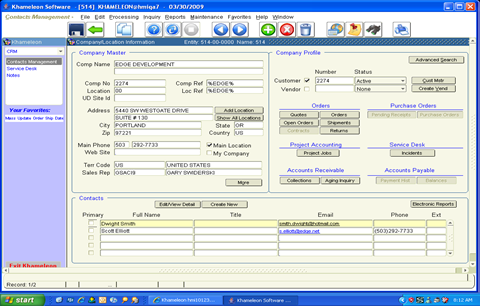
1. From CRM> Contacts Management> Maintenance> Companies, Locations> Company Master, query a particular customer record and click the Electronic Reports button found in the lower right hand corner. This button will call a screen where contacts and electronic address information for the current Company record are identified for various reporting outputs like invoices and order confirmations. This screen can also be accessed directly from the menu at CRM> Notes> Maintenance> Addresses for Electronic Reports.
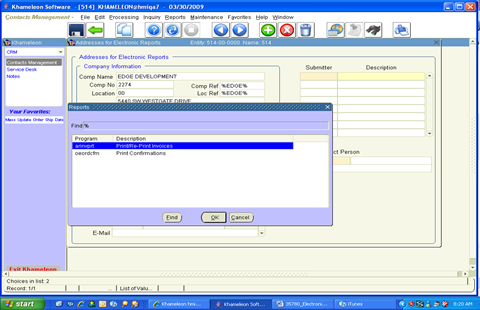
2. Within the Addresses for Electronic Reports screen, on the right hand side, first select a report submitter from the list of values in the upper right. All report submitters eligible for e-mail delivery will appear in this list of values.
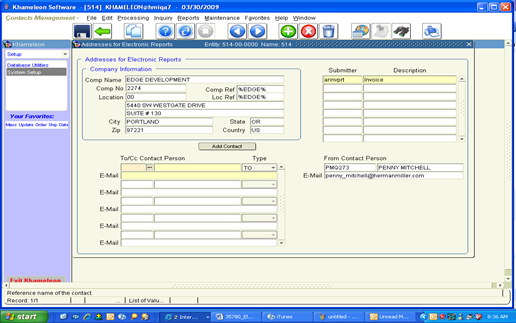
3. Click down into the From Contact Person field and use the list of values to select a From Contact person to be used as the From Contact for outbound e-mails generated for the selected report, for this particular customer or vendor record. The From Contact list of values utilizes contacts that exist in the ‘My Company’ record, and requires the presence of a Work E-Mail communication (WKEM) set up at the contact level.
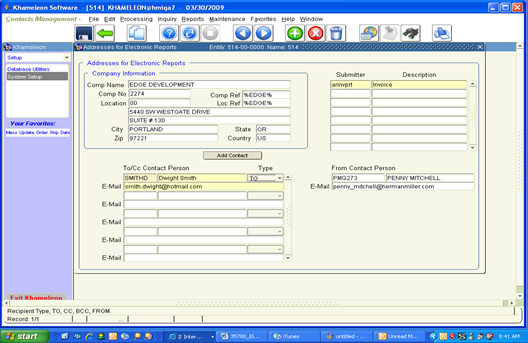
4. Lastly, click over into the To Contact list of values on the left, which utilizes contacts that exist for the current Customer or Vendor record, and again requires the presence of a Work E-Mail communication (WKEM) set up at the contact level. For report distributions that need to go to multiple contacts, additional To Contacts can be added here as required. If the desired contact does not exist within the list of values, use the Add Contact button found up in the Company Information frame to create a new contact.
5. Update any additional report submitters, from contact person, and to contact persons, then save & exit.
Once the above configuration steps have been completed, during normal transactional processing, the defined reports are available for e-mail distribution instead of standard Pdf output generation, for company records who have Addresses for Electronic Reports specified. E-Mail Dispatching can be bypassed, or batches can be previewed first by following the standard process of going to the report submitter and simply clicking the Submit button. E-Mail Dispatching is only utilized when the user clicks the Electronic Reports button and makes a selection before submitting the report.
Examples
The example below walks through the process for an Edge Distribution customer invoice.
1. From the Invoice Print Submitter screen, two new buttons appear in the lower left hand corner – Electronic Reports, and Review Electronic Reports. Click the Electronic Reports button which will call the small canvas displayed below. Users have the option of selecting E-Mail Electronic Reports (Dispatch Now) or Review Electronic Reports (Dispatch Later).
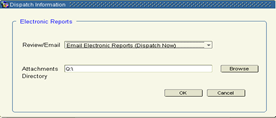
2. Select E-Mail Electronic Reports (Dispatch Now) to generate outbound e-mails to the defined contacts set up in the steps above. Click OK to return to the Invoice Print Submitter. Click Submit to execute the E-Mail dispatch.
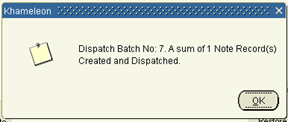
3. A success confirmation message will be presented providing details on the number of note records generated and dispatched, as illustrated below.
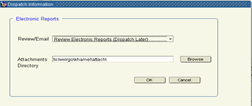
4. Should the user prefer to hold e-mail creation for review and later dispatch, select Review Electronic Reports (Dispatch Later) from the small canvas below. Click OK to return to the Invoice Print Submitter. Click Submit to generate but not transmit e-mail dispatches. The user can now review these unsent dispatches by clicking the Review Electronic Reports button within the submitter itself – or by navigating to CRM> Notes> Inquiry> Notes Dispatch History.
Electronic Report dispatches are accomplished by creating a Khameleon Note record. As it exists throughout the application today, note records can be anchored to customers, orders, projects, etc. In this case, the note record is anchored to the invoice document – so it is available for historical review anywhere that invoices can be reviewed – as in the Customer Balances Aged Inquiry> highlight the invoice record, and click the Notes icon on the tool bar. Within this screen the user can see the note record itself, as well as view dispatch history and view the attachment. The same would hold true for Order Confirmations by navigating to the Sales Order screen, and using the Notes icon on the tool bar to review Notes history.
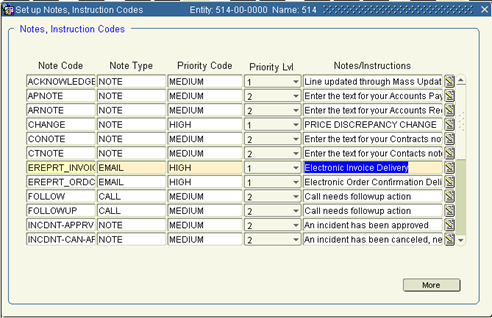
Two new NOTE CODES have been created to carry this logic specifically for Electronic Invoices and Order Confirmations. The NOTE CODES can be found at CRM> Maintenance> Note Codes as EREPRT_INVOICE and EREPRT_ORDCFM. The value displayed in the Notes / Instructions column represents the text that will be inserted into outbound e-mails dispatched from the Khameleon application. These values can be updated here within this screen as needed.
A screen specifically dedicated to the review of Electronic Report dispatches is available at CRM> Inquiry> Notes Dispatch History. Records can be queried by date, Note Code, etc., and can also be re-dispatched as needed.