F9 v5.0 Administrator Installation on Windows 2003 Server
F9_prod_test_prof.zip F9_V5_Administrator.zip F9vwcre.sql Ldi_Files.zip F9_proceedure_setup_oracle_schedulejobs.txt Raja, where is the archive location of these files on our network? |
Login to ftp://ftp.khamsoft.com/Software/F9_Installer/ Download and unzip F9_V5_Administrator.zip, f9vwcre.sql, F9_prod_test_prof.zip, ldi_Files.zip Verify drive has at 4GB free space for F9 data files for prod. 8GB for prod and test F9 V5 Administrator: F9 V5 Pro Large Betrieve with Datapump: http://www.f9.com/downloads/F9Pro_Datapump.aspx |
||||
Verify scripts in the Khameleon rev752 F9 directory are present |
Infra = f9prcinf.sql Admin = f9prccre.sql, f9pubsyn, and f9vwcre.sql Current SQL Scripts for Khameleon version /release 7.5.2 located in P:\Releases\Version7\REV752\kr\f9 The scripts in the Khameleon install tree may be old |
||||
|
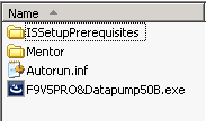
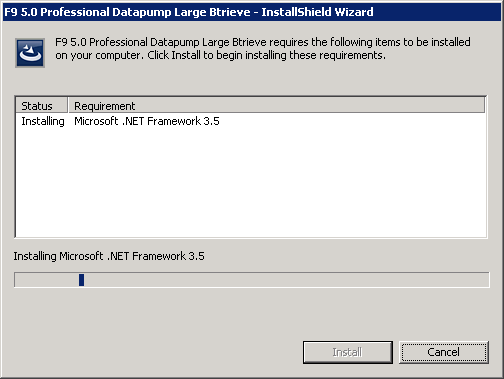
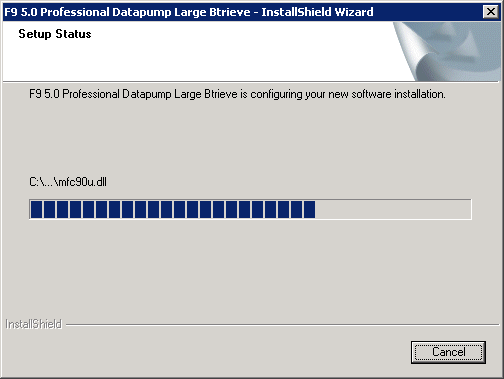
Go to F9_V5_Administrator Run F9V5PRO&Datapump50B.exe Before installation F9 Setup automatically install prerequisite for F9 installation it will take 10 to 15 min to complete |
||||
|
After Microsoft .NET prerequisite installation it will ask you to restart computer. Click no and continue the installation. Reboot server after business hours. |
||||
|
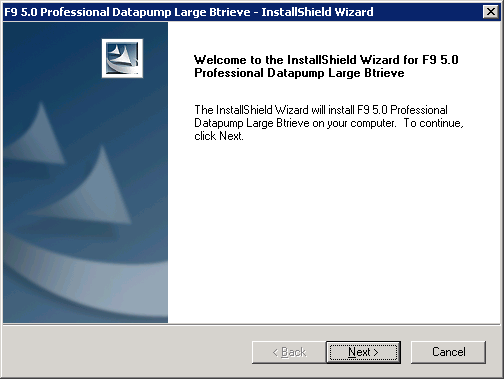
Now once again double click on F9V5PRO&Datapump50B.exe to start F9 administrator installation |
||||
|
Click Next |
||||
|
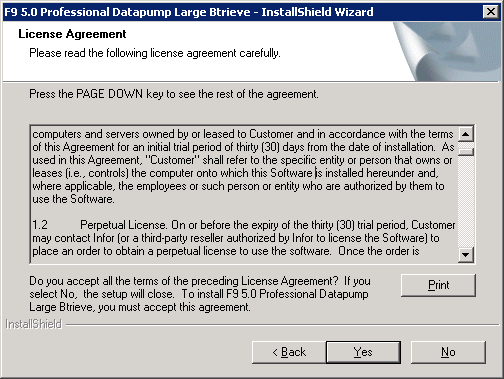
Accept License Agreement by clicking Yes |
||||
|
Select your destination folder. Click Next to continue F9 installation |
||||
|
|
||||
|
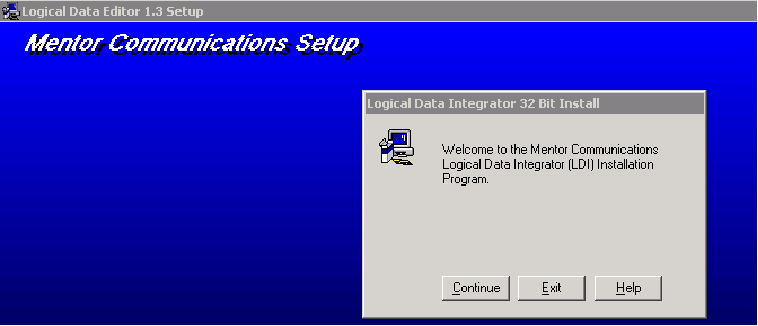
LDI Editor installation via the Mentor Communication Setup automatically pop up at the end of F9 admin installation Click Continue |
||||
Select F9 administrator home location Ex: C:\F9V5 |
|||||
|
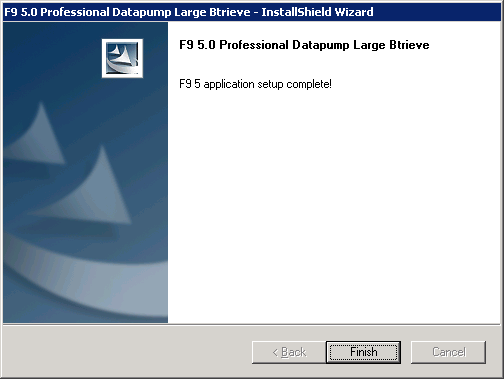
Click Finish to complete F9 administration installation |
||||
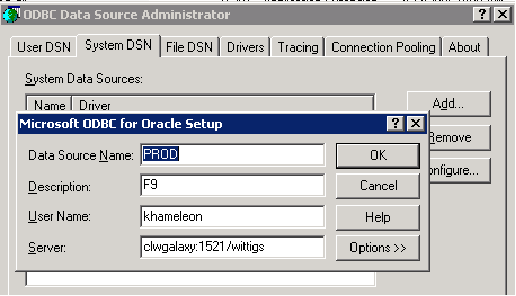
Create ODBC connection for F9 to access data from production Database (and test) |
|||||
|
Windows 32 Bit : Run C:\WINDOWS\system32\odbcad32.exe Windows 64 Bit: C:\WINDOWS\SysWOW64\odbcad32.exe Go to System DSN tab à Add new Microsoft ODBC for oracle setup by clicking ADD button. Note: Oracle ODBC did not work in system testing. Microsoft ODBC not system tested on Windows 2008 |
||||
Copy LDI_files and datapump.ini file to C:\F9V5\pro50_b Location Now connect to PROD database as khameleon user and run @f9vwcre (and run on test) Note : This will create Required F9 Views in Khameleon database |
SQLPlus khameleon@PROD SQL> @E:\Download\F9\f9vwcre.sql Creating G/L views ... please wait. View created. |
||||
Run 3 other scripts Update with latest GL form on Khameleon v 7.5.2 ● Glctl.fmb ● Glf9ext.fmb These forms are included 7.6 release. |
Infra = f9prcinf.sql Admin = f9prccre.sql, f9pubsyn.sql, and f9vwcre.sql Infra script run on App Server infra db Admin scripts run on Oracle DB server instances Prod and Test. For f9pubsyn.sql: CREATE or REPLACE PUBLIC SYNONYM F9_DATAPUMP_DB FOR khameleon.F9_DATAPUMP_DB@KHAMADMIN; CREATE or REPLACE PUBLIC SYNONYM F9_DATAPUMP_FAST_DB FOR khameleon.F9_DATAPUMP_FAST_DB@KHAMADMIN;
|
||||
Create a folder called f9data with share name f9data and Permissions Everyone/ Read and Write Ex : C:\f9data |
|
||||
Add write permission to the Users on the *.CMP file in the C:\f9data folder |
To allow users to update their Current Period from Company Edit on their F9 Professional workstation. |
||||
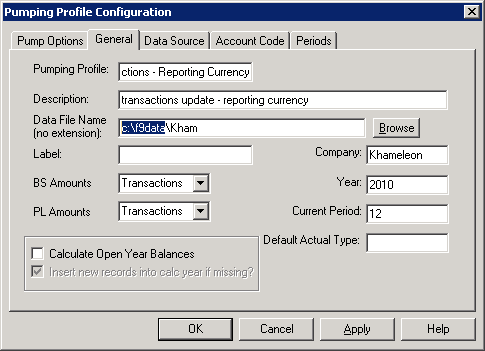
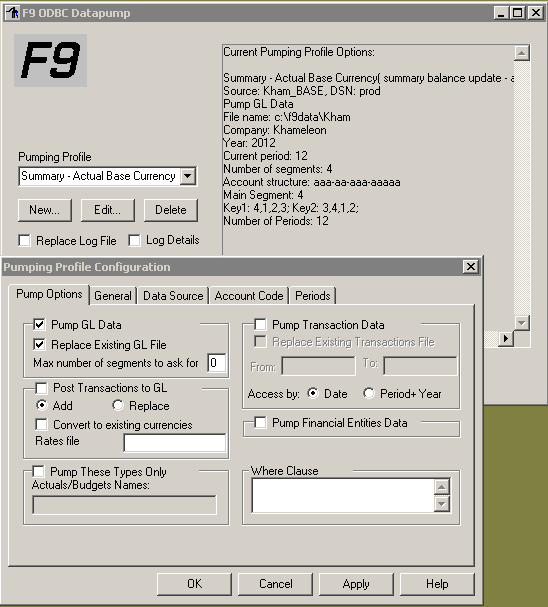
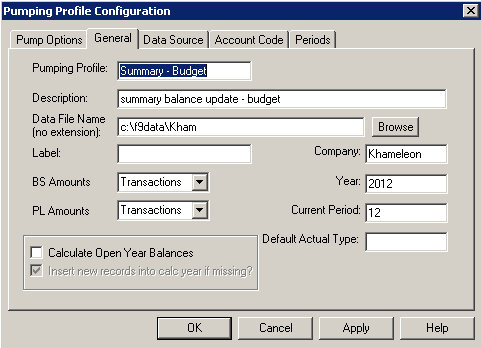
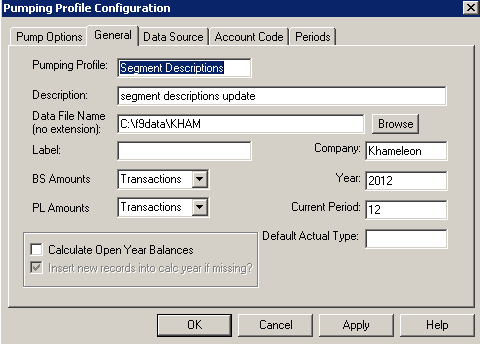
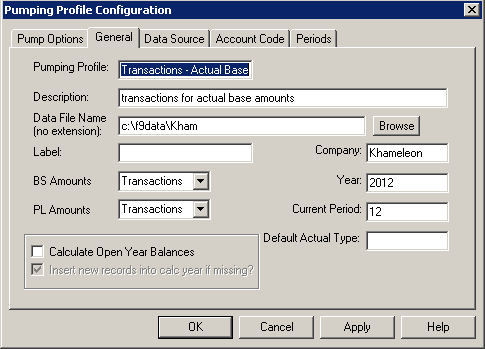
Edit Configuration of all Pumping Profiles. Open datapump.ini and edit “Data File Name”: Ex: FN= c:\f9data\Kham ● Change all year values to current year ● Change Segment Length EXAMPLE: ACTSIZES=3,2,3,5 as directed to by Dwight/ Consultant or use instructions in the F9 Client installation document on how to identify segment lengths in Khameleon ● Edit Segment Names using the F9 Add-In f9edit.xll using instructions in the F9 Client installation document ● Edit DSN values for the production and test Pumping Profiles, respectively. ● Edit Company= “Customer’s Business Name” ● Set the Main Segment to be the accounting segment which is either 3 or 4 depending whether Divisions segment is setup in the GL. Note: If you check Replace Log File, the pump.log will not keep any history. Only check Log Details during debugging as the pump.log will grow rapidly. Run C:\F9V5\pro50_b\datapump.exe, or from Windows Start Menu/ All Programs/ F9 5.0/ F9 Datapump (Large) Btrieve. Choose Edit to verify changes to database.ini appear correctly in the Pumping Profiles. |
|
||||
|
|||||
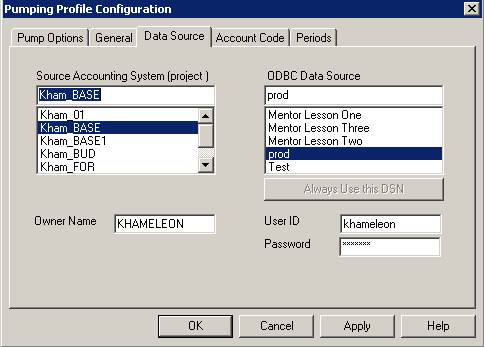
● Change ODBC data Source for all F9 Pumping Profiles to Prod or Test as required. ● Change User ID and Password for the ODBC account used for the F9 Pumping Profile connection. Preferably use the readonly account instead of khameleon. When the User ID is setup on a profile using Source Accounting System of Kham_BASE, other pumping profiles which use Kham_BASE are automatically setup with the same User ID and Password, both in F9 prod and test profiles. In cases when the khameleon password is different in prod and test, the last password entered is updated in all profiles. |
|
||||
Click Apply to save changes |
|||||
|
|||||
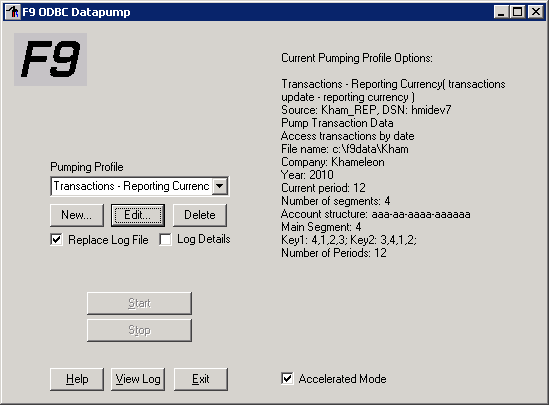
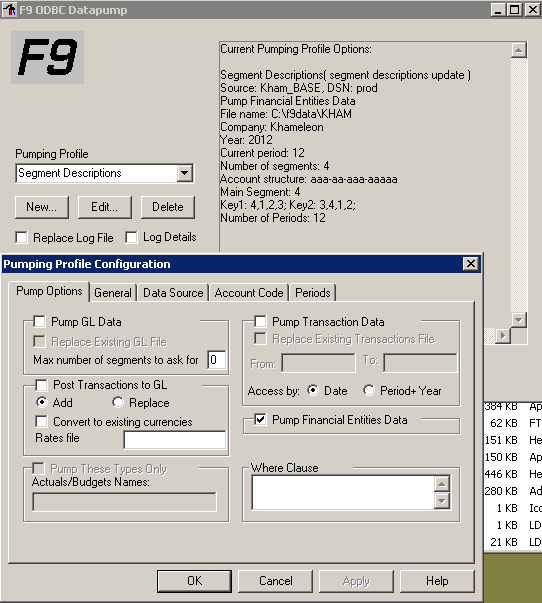
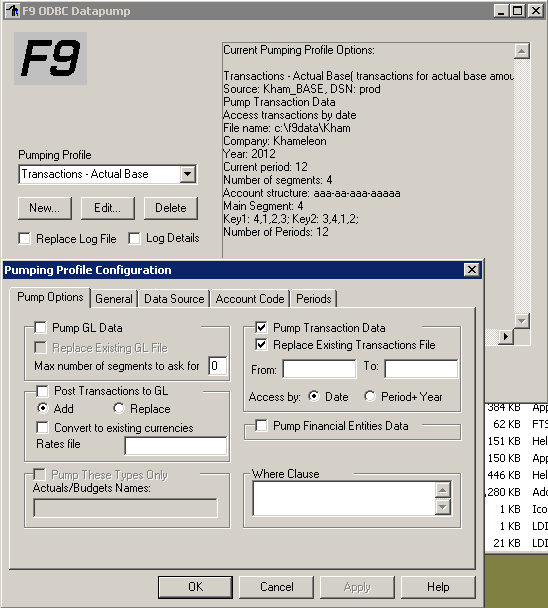
Khameleon customers use 3 or 4 profiles out of all those available in F9. The order below must be duplicated in the Pump jobs. Pumping out of order can cause data errors. Never pump any profiles other than these: 1. Summary Actual Base Settings uses SAS project Kham_BASE 2. Summary Budget (Not for all customers) uses SAS project Kham_BUD 3. Segment Descriptions uses SAS project Kham_BASE 4. Transactions –Actual Base uses SAS project Kham_BASE Configure settings on these profiles exactly as in the following examples. |
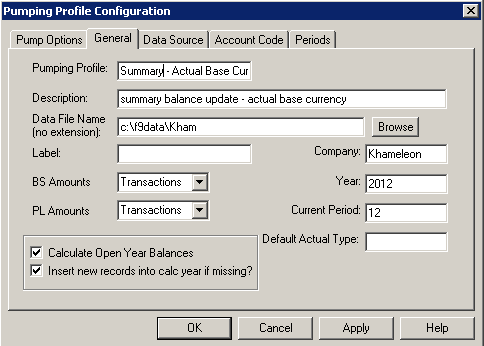
As you setup the Datapump Profiles ● Current Period on the General Tab should always be the last period of the year. In most cases it is 12. ● Update year values to current year |
||||
1st Profile: Summary Actual Base Currency Settings Examples |
|
||||
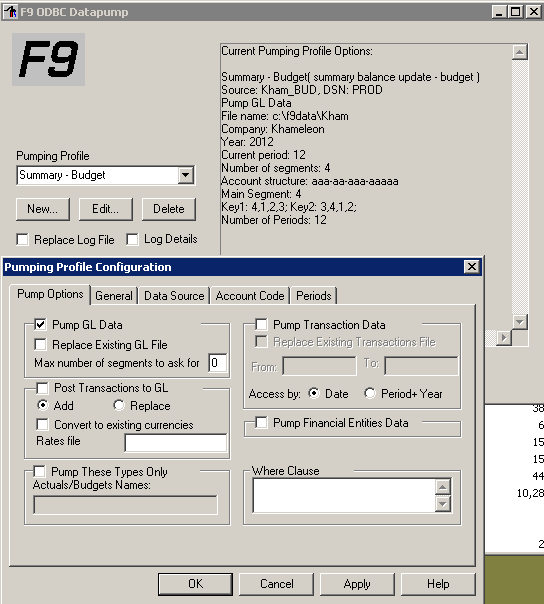
2nd Profile (not mandatory for all customers) Summary Budget |
|
||||
|
|||||
3rd Profile Segment Descriptions |
|
||||
|
|||||
4th Profile Transactions –Actual Base |
|
||||
It is OK to delete all of the \f9data\KHAM files and recreate them by running the profiles from the F9ALLUpdate.BAT job, but deleting the SAD file will delete the segment names you setup later in this document. An example where this applies is after making changes to profiles. If there is any question whether data is wrong due to a mis-applied setting in profiles or .ini file, delete the KHAM files. |
|||||
Schedule Data Pump Scripts to run every night |
|||||
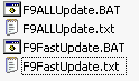
Download and Unzip F9ALLUpdate_scipts.zip |
|
||||
Copy all *.BAT and *.txt files to C:\F9V5\pro50_b\ |
Create folders C:\f9data\backup and backup_test |
||||
Enable Oracle Job Scheduler Service |
Open Windows Services, OracleJobSchedulerInfra Set it to Automatic and status “Started” |
||||
Setup Oracle job for F9ALLUpdate |
Login to the INFRA database and setup F9ALLUpdate to run at night during off production hours. Create SQL script from F9_proceedure_setup_oracle_schedulejobs.txt |
||||
Verify F9ALLUpdate Job works properly |
Open SQLPlus. Login to the INFRA database. select * from dba_scheduler_jobs to verify completion. |
||||
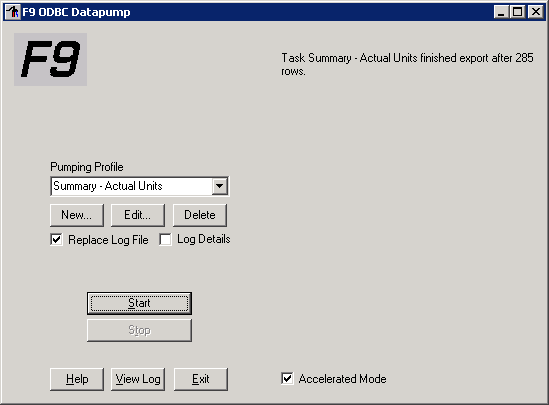
Test F9ALLUpdate and F9FastUpdate from F9-Extract in Khameleon |
Run On demand datapump from Khameleon. Open Khameleon Forms. Under Accounting/General Ledger/Processing/F9-Extract. Test the Detail and the Summary processes. |
||||
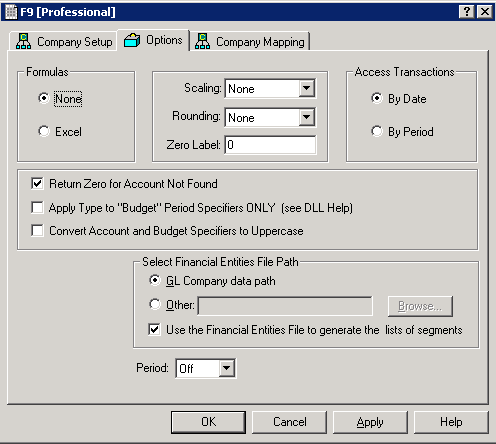
Settings |
|||||
All F9 Professional Client Installations Check the box for Use financial entities to generate list of segments" in the F9 setup /options window for Segments to appear. Segment data is updated from the SAD file when this is checked. ● SAD file – Contains account segment descriptions (Segment Descriptions) |
|
||||
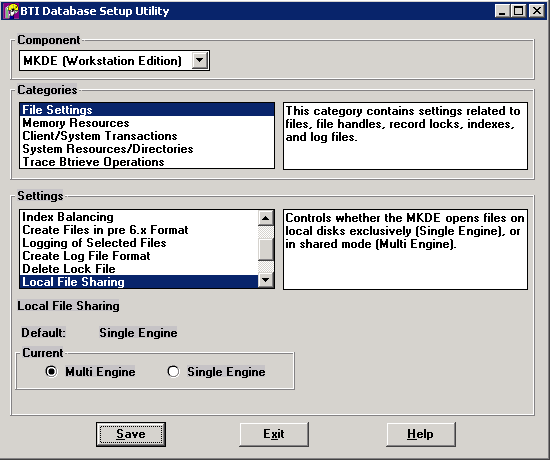
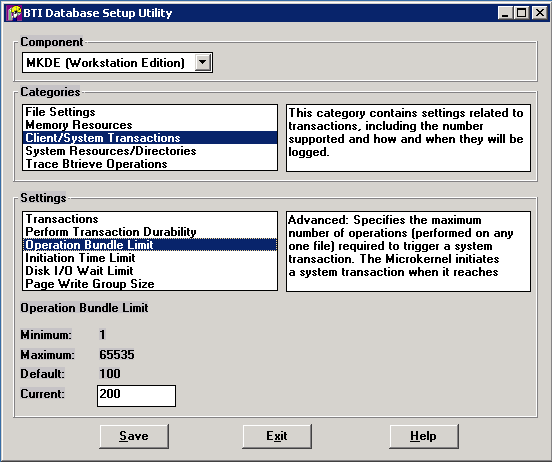
BTI Database Setup Utility Launch W32MKSET.exe |
Set Local File Sharing to Multi Engine |
||||
Verify Operation Bundle Limit =200 |
|
||||
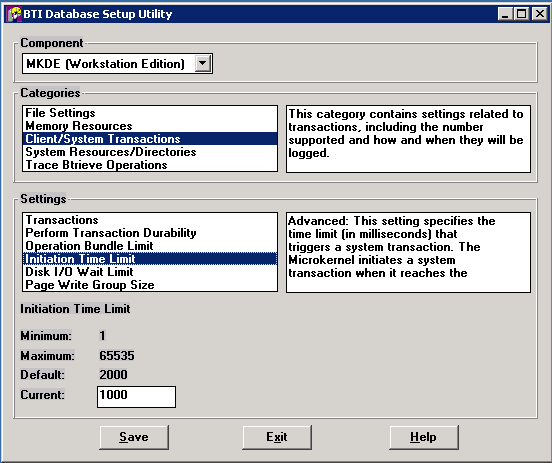
Verify Initiation Time Limit =1000 When you hit Save and Exit, the Btrieve registry in HKEY_LOCAL_MACHINE\SOFTWARE\Btrieve Technologies is created. On 64 bit OS: HKEY_LOCAL_MACHINE\SOFTWARE\Wow6432Node\Btrieve Technologies |
|
||||
Check with your accounting department for Segment name and length information needed for workstation configuration. See F9_Client_Installation document for self-service accounting segment setup instructions. |
Example: Segment1= Company, Length=3 Segment2= Division, Length= 2 Segment3= Department, Length= 4 Segment4= Account, Length= 6 |
||||
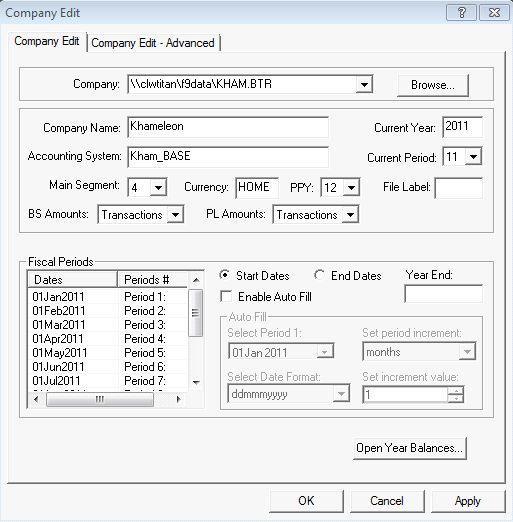
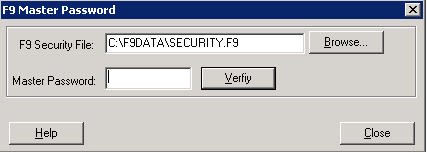
Security.F9 configuration for F9 Client Use F9 File Maintenance Utility, FMU.EXE, in the F9V5\pro50_b\ to configure the Security.F9 file to be used on by F9 Client Add-In on Excel. Take a copy of the Server’s SECURITY.F9 file in F9V5\pro50_b\ to f9data\ In FMU, open Security, Master Password and change the F9 Security File path to new copy in f9data\SECURITY.F9 Enter Master Password: F9 and hit Verify. The Server’s SECURITY.F9 file will have configuration to absolute path of the BTR file. This must be deleted. • BTR file – Contains a Chart of Accounts and Balances (Btrieve format)
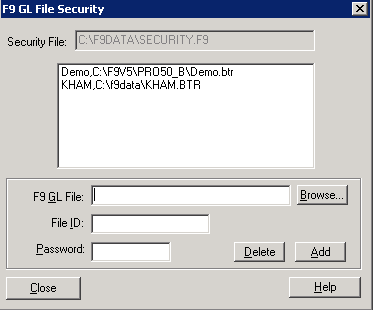
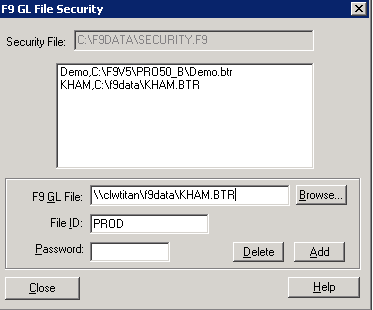
Open Security File and Add a UNC path to the KHAM.BTR on the server and set the File ID to PROD. Do the same for KHAM_TEST.BTR and call it TEST. Workgroup servers may have trouble with a password popup. If prompted for password, try using the IP address instead of server name. |
|
||||
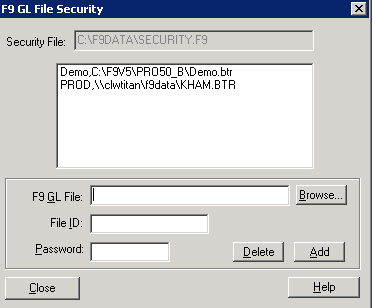
Finished configuration example: |
|
||||
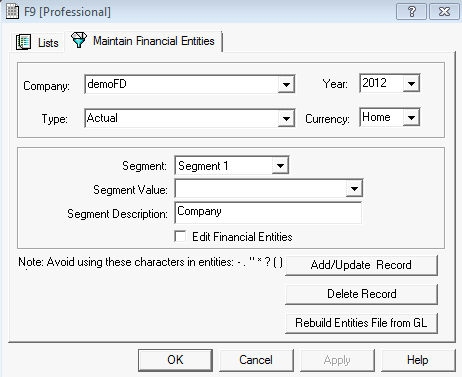
Setup Segment Descriptions
Note: Blank the Segment Value before entering the description hit the dropdown box and scroll down to the empty bottom row. 1 is Company, 2 is Division, 3 is Department, 4 is Account. Skip Division if not used. |
|
||||
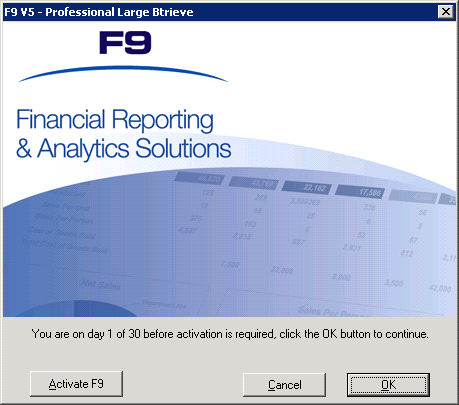
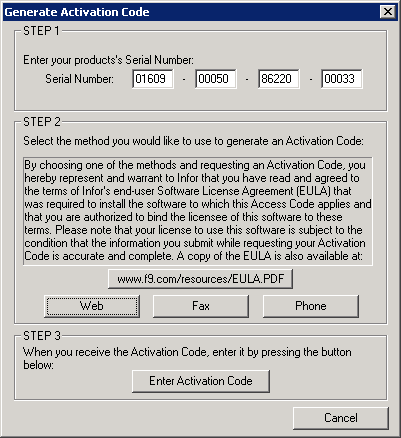
Activate F9 Software Each time when we open F9 it will ask us to Activate F9, Click Activate F9 Or Go to F9.exe Utilities\License\Activate Do not Activate the software on the server if Excel and the F9 Add-in are not run on the server. |
|
||||
Step 1: Use the Customer’s Serial Number provided by Dwight/Consultant to activate F9 Example: 01609 00050 86220 00034 Step 2 : Click on Web à Generate à |
|
||||
Fill in required Contact Information fields and click Submit Now the activation key will be send to E-mail address mention in the Contact Information Use Activation Code sent to your mail ID in Step 3 |
|
||||
Common Issues:
1) TRX file should be considerably larger than BTR
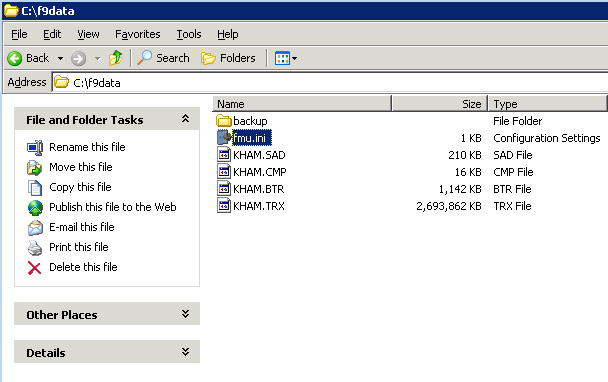
● BTR file – Contains a Chart of Accounts and Balances (Btrieve format)
● CMP file – Contains basic company information (Company)
● SAD file – Contains account segment descriptions (Segment Descriptions)
● TRX file – Contains transaction detail information (Transaction details – if imported)
2) Setup Periods on Pumping profiles according to customer Fiscal Year for proper TRX data drill down.
Dates under Period Breakdown on Pumping profiles should contain 9 characters.
Example: PERIOD= 01Jan2011 not 1Jan2011
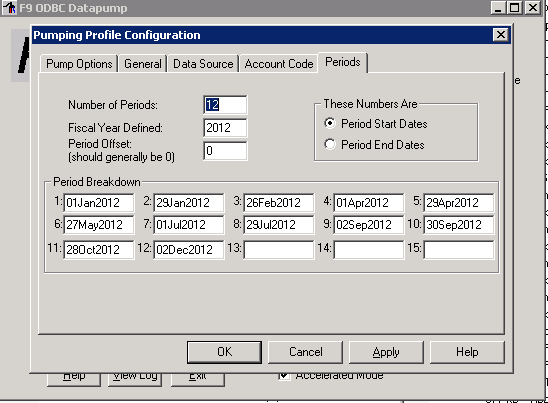
ALWAYS ask Customer for their Fiscal calendar year and period start dates. This information can also be found in GL Calendar Code Maintenance.
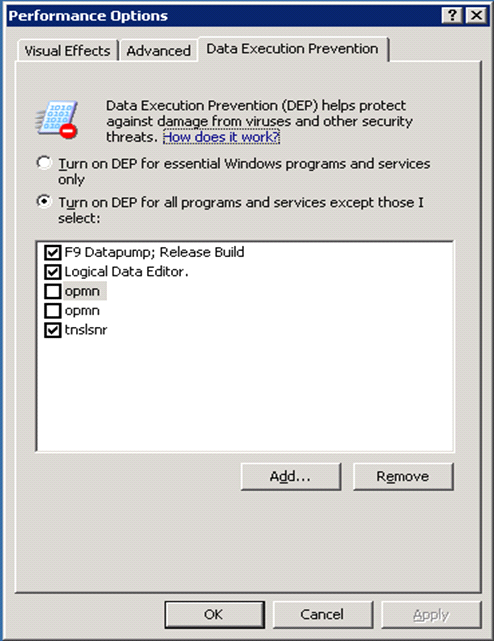
3) Data Execution Prevention Exemptions. Add Exceptions for datapump.exe and ldieditd.exe if the Event log shows datapump.exe fault errors. Open System Properties, Advanced Tab under Performance settings. The server must be rebooted to apply the changes.
4) Annual Maintenance: After Jan 1st, update the year values in the data pump profiles to current year.
5) Accounts not appearing while accessing data for F9
Keep the year current in F9 Company Setup. 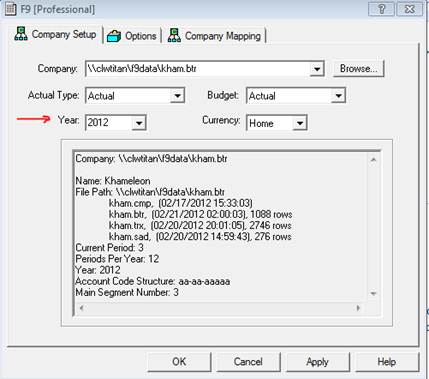
F9 Company Setup/ Options, check Use Financial Entities File to generate the lists of segments. 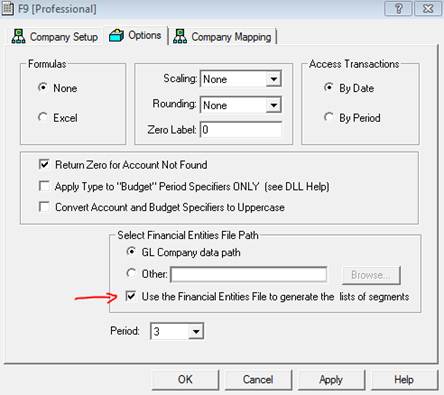
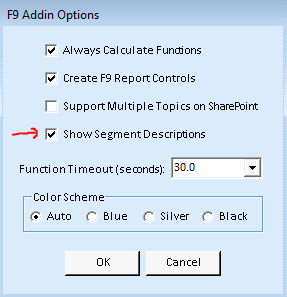
In F9 Add-In Options, check box for Show Segment Descriptions.
6) Companies which perform a hard close in Khameleon which moves data to a historical archive table may not see the data in F9 through the Khameleon Data view.