Khameleon Version 7 User setup begins with a Contact Person record associated with your ‘My Company’ record. In the company master, select the contact to be added as a user and click ‘Edit/View Detail’.
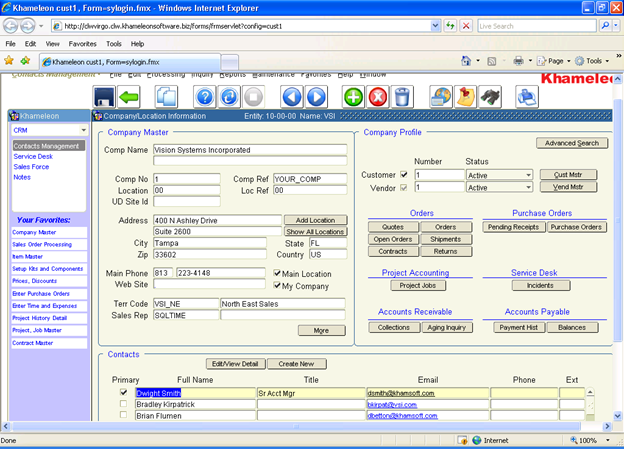
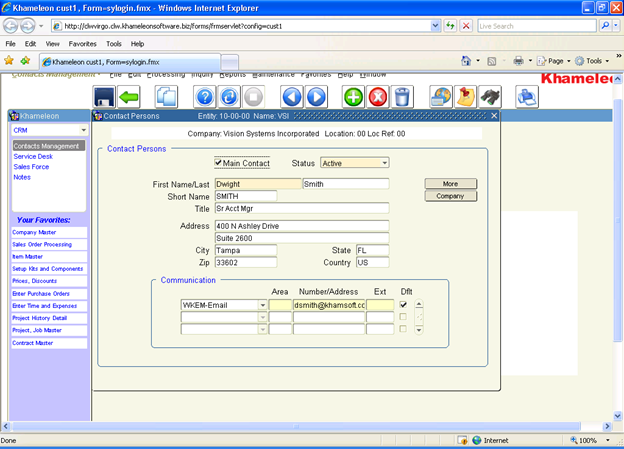
If the contact does not have a work email set up (communication type WKEM-Email), enter it. It is required for portal users.
Then click ‘More’.
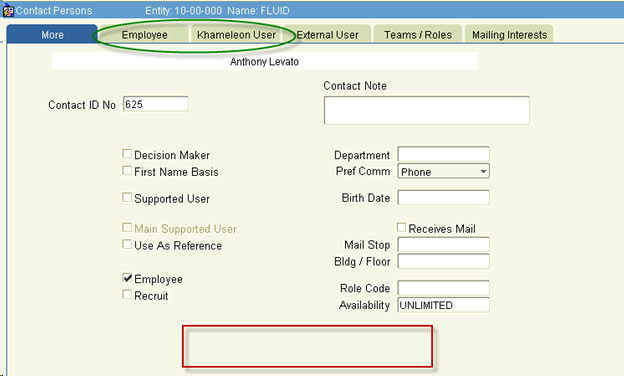
Click on ‘Setup User’.
The employee and user buttons used to be located where the red box is below. Now they are tabs – shown by the green circle in the top.
The setup user screen is displayed.
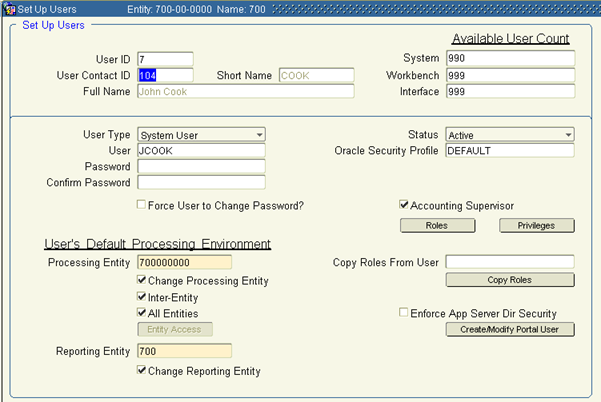
Set up is as follows:
● User Type: Select the appropriate user type. (see ‘Determining User Type’ section for more information)
● User: User name (NOTE: User names CANNOT begin with a number)
● Password: Enter or change the user's password
● Confirm Password: Re-enter the password for confirmation
User's Default Processing Environment:
● Processing Entity: Default Processing Entity for this user
● Change Processing Entity: Check if the user can process in multiple entities
● Inter-Entity: Check if the user may make entries between entities
● All Entities: Check if user has access to all self-balancing entities and sub-entities
● Entity Access: If processing in a multi-entity environment you may limit the entity access for this user from this button. Enabled only when the All Entities flag is unchecked
● Reporting Entity: Enter the default reporting entity for this user
● Change Reporting Entity: Check this box if the user may report at other reporting entity levels
● Status: Users may be set to ‘Active’ or ‘Inactive
● Oracle Security Profile: Please contact your DBA regarding this functionality if it is required to enforce password complexity restrictions on user accounts
● Accounting Supervisor:Check this flag for users who should have the ability to see and post batches created by other users. Accounting Supervisors may also post transactions to periods set to ‘Supervisor’ status within the Calendar Codes management screen.
● Roles: Click this button to assign the roles to this user. See Roles section below.
● Privileges: Click this button to assign Privileges for this user. See Privileges section below.
● Copy Roles from User: If setting up a new user you may select the user to copy from and click the ‘Copy Roles’ button. You will be prompted to set up the Oracle account for this user. Click ‘OK’.
● Enforce App Server Dir Security: Future feature
● Create /Modify Portal User: All Workbench user management must occur from here. Click the button to create a portal user.
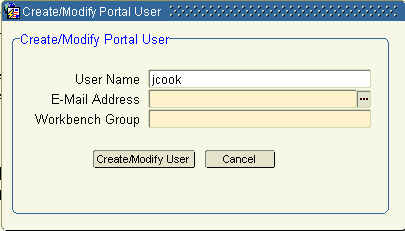
● User Name: Displays selected user name
● E-Mail Address:Using the LOV, select the email address entered at the Contact Person record.
● Workbench Group:Using the LOV, select the appropriate Workbench for the user.
● Click the ‘Create/Modify User’ button to attach the user to that workbench. The user can now log into their workbench with their user name and the temporary password: password1.