This process closes a project so that data may no longer be accumulated or posted to it. If a project is closed and late charges are received that need to be charged to the project, the project may be re-opened. Each job within a project must be closed separately. You may remove any project/job from this screen before the update process is competed. Before performing this step, Cost WIP needs to be zero.
From the Main Menu, go to Projects\ Project Accounting\ Processing\ Close Projects.
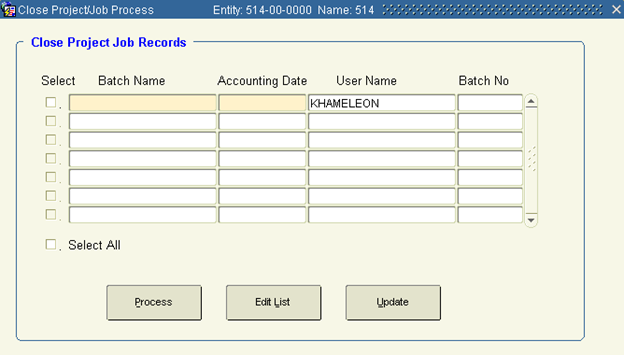
1. Create a new batch.
2. In Batch Name, enter a batch name
3. In ‘Accounting Date’, enter the date the system uses to post any remaining transactions in the WIP account for the project/job to the General Ledger account specified in the project category.
4. Click Process.
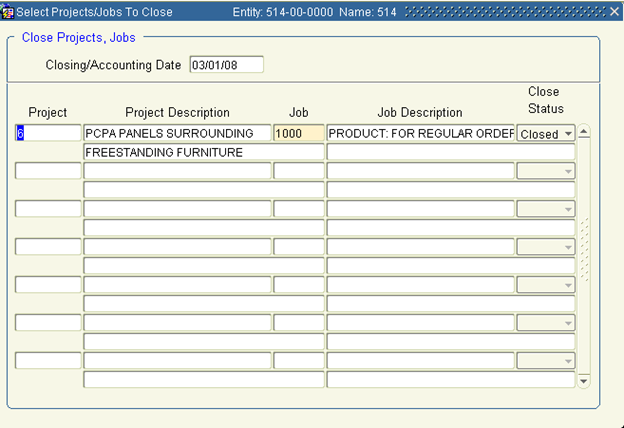
1. The default date in ‘Closing/Accounting Date’, represents the date the system uses to post any remaining transactions in the WIP account for the project/job to the General Ledger Account specified in the project category.
2. Tab to Project. Use the LOV to select the project containing the job you want to close.
3. Tab to Job. Use the LOV to select the job you want to close.
4. Close Status should be ‘Closed’, and may not be modified.
5. Continue to the next line, and repeat steps 7 & 8 until all the jobs you want to close have been selected.
6. Save and Exit.
This process assumes the closing of a project was acceptable and you want to update so that the project is no longer active.
1. Check the Select box that corresponds to the batch numbers you want to update. You may also select the Select All option to update all open batches.
2. Click Update. The system will notify you that it is about to post the batch you've chosen. Click OK.
3. Exit the form.