From any screen within the Khameleon application where the  icon is enabled
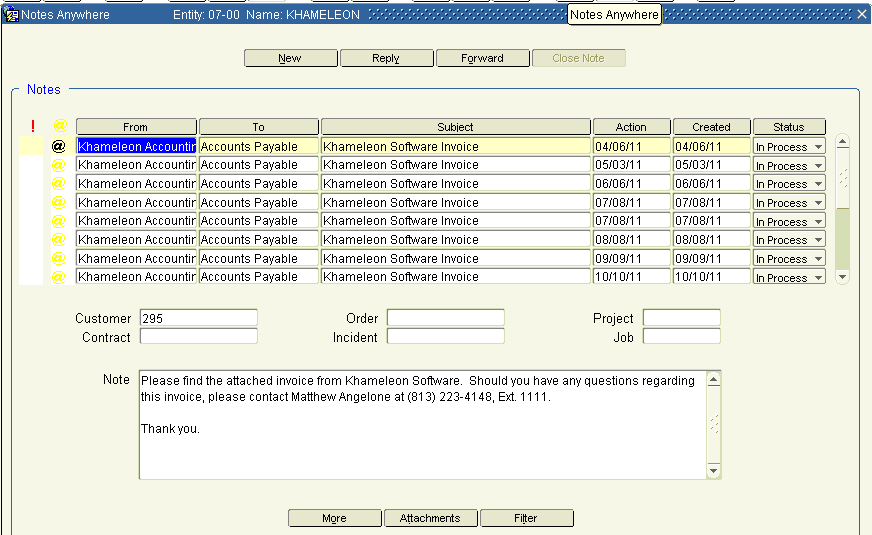
Click the  icon to call the Notes Anywhere canvas. The initial canvas displayed represents a listing of all previously created Note records anchored to the source object in the previous screen. Notes are listed in ascending order based on the date that they were Created. Column headings appear as buttons which when clicked will sort the respective column values in ascending order, or descending order if clicked a second time.

From this canvas, users can Reply to or Forward existing Notes, which closes the original Note record and creates a new Note. The More button can be used to access additional details related to the Note, and the Attachments button will take the user to the Attachments canvas where they can view files attached to the Note.
If the current user was the original author or recipient of the Note displayed, they have the ability to click the Close Note button which will set the status of the Note to closed.
Click the New button to create a new Note record. The Note will be anchored to the source object displayed in the center of the canvas, as in above, customer # 295.
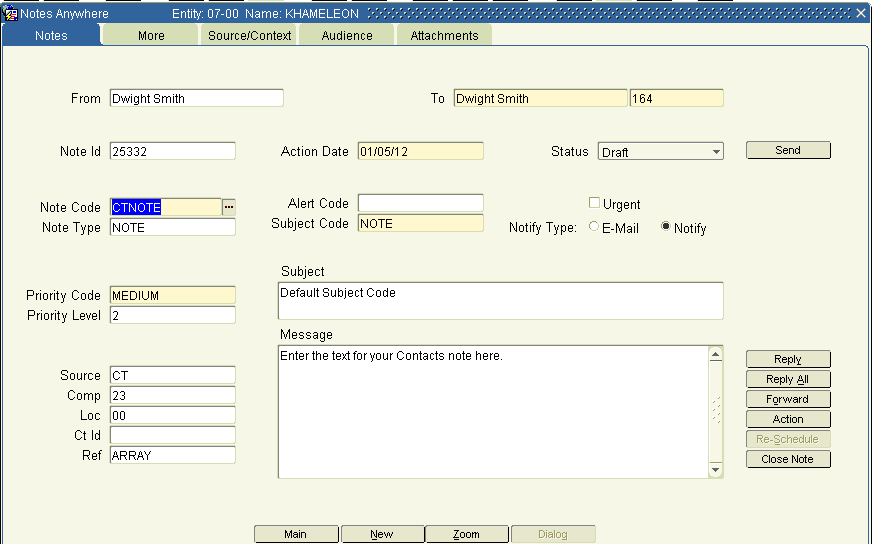
Based on the module / screen where Notes Anywhere was invoked, the default Note Code will be defined as XXNOTE, as seen below. The list of values can be used to select alternate Note Codes for structured communications.
By default, all Notes are generated with the current user contact record as both the From contact as well as the To contact. The To contact can be changed using the list of values to select from any contact, internal or external, which exists in the system. Users can also go to the Audience tab of the Notes canvas to manually add additional contacts to the Notification, or to the More canvas to assign a Workgroup to the Note record for group dispatch purposes.
After selecting the applicable Note Code during creation, fields such as Subject Code and Subject, Notify Type, and Message body will be populated based on how these values were defined during the Note Code set up. These values can all be updated or over-ridden prior to clicking the Send button.

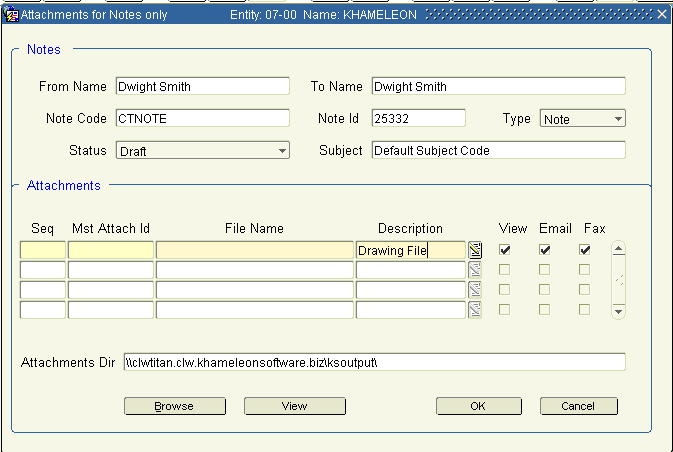
Users can also navigate to the Attachments tab and click the Add Attachments button to add document attachments to Note records. When attachments are present on a Note, they are included in the e-mail dispatch of the Note Record, if applicable, and also can be viewed from within the Task Notifications console of the Khameleon Workbench.
Using the Browse button, users can browse anywhere on their local workstation or network directories to select documents for attachment. Clicking the OK button will actually copy the file from its current location to the defined Attachments Directory specified within the Contacts Control record> Mail Info tab (displayed below as Attachments Dir). There is no limit on the number of files which can be attached to a single Note record.

After updating subject, note text, workgroup / audience members, and attaching all required documents, users can return to the main Notes creation screen and click the Send button. All fields can be updated while the Note record remains in Draft status, but once Sent, values can only be updated based on the Updateable and Deletable flags as defined in the Note Code setup screen.