Create the Order
From the Main Menu, go to: Distribution\Order Entry\Processing\Order Processing\SIF Wizard
The only way to access other screens while working with this wizard is to choose Cancel.
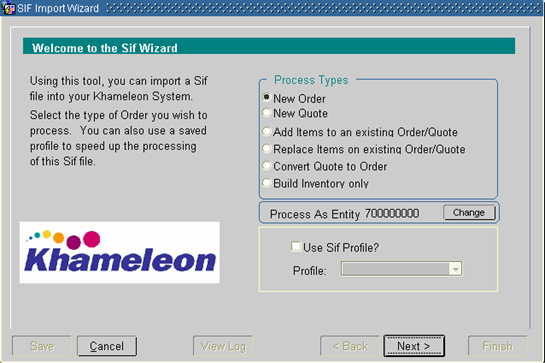
1. The New Order button is highlighted, click Next.
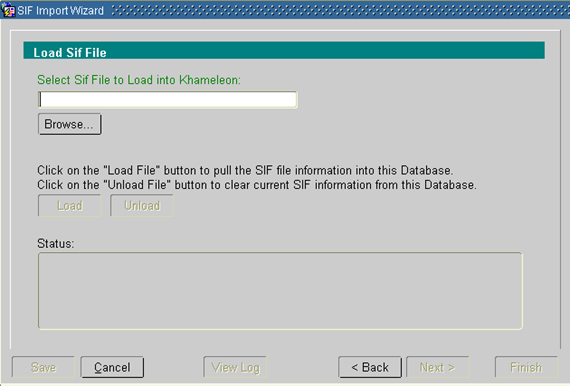
2. Choose the .sif file to include with this order, subsequently loading it into Khameleon:
a. Click Browse to find the .sif file. Click on it, and then click Open.
b. The path to the .sif file now appears in the field above Browse. Click Load to import the .sif file into the Khameleon software database. The “Waiting to Load File…” text box keeps you apprised of the status of your import. If errors occur, it is possible to view the log to determine their cause for solution purposes. If necessary, .sif files can be unloaded, which will clear that .sif information from the database.
c. Click Next.
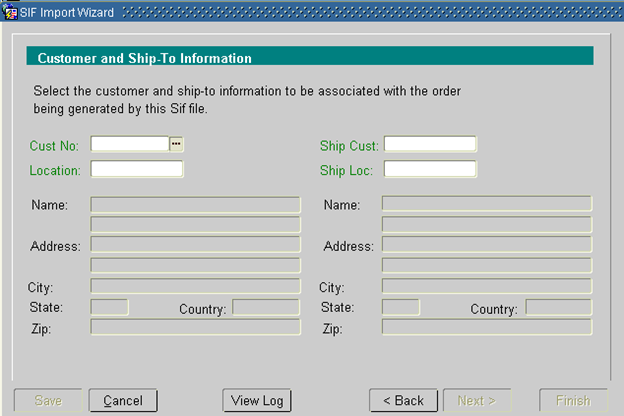
3. Once in the Customer and Ship-To Information screen, populate the following fields as indicated below:
Cust No Using the LOV, select the customer to which this order will be sold. Select the “special added location” you would create for this customer, specifically for GSA/Direct business.
Location Using the LOV, select the customer location to which this order will be sold. If GSA/Direct, keep in mind that this is GSA/Direct business.
Ship Cust If you'll be shipping to a customer other than that chosen in Cust No, select it from the LOV. If you leave this field blank, the system will automatically populate it with the same value that appears in Cust No as you go to the next screen.
Ship Loc If you will be shipping to a customer location other than that chosen in Location, select it from the LOV. If you leave this field blank, the system will automatically populate it with the same value that appears in Location as you go to the next screen.
4. Click Next.
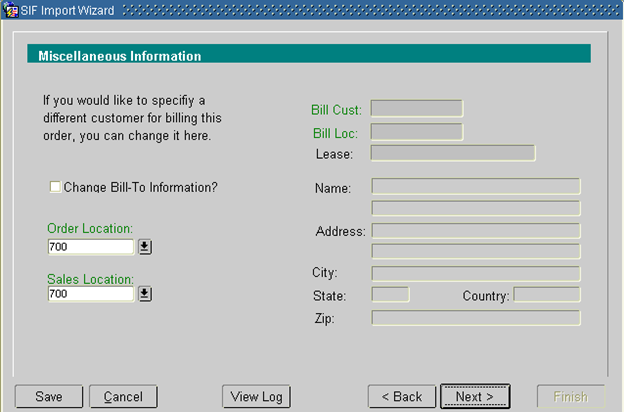
5. You are now in the Miscellaneous Information screen. You may define an alternate Bill-To customer and location, if desired (as in a lease order, for example.) Use the LOV to populate the fields as indicated:
Change Bill-To Information? If there is a different Bill-To customer from that chosen on the previous screen,check this box, and populate the fields below, which appear only if this box is checked. For GSA/Direct orders, you will need to use this feature.
Bill Cust |
Customer name. |
Bill Loc |
Bill-To location. For GSA/Direct, choose ‘00’. |
Lease |
You may assign a lease identifier to this order. Not applicable for GSA. |
Order Location |
Location to be credited. (The default comes from the user’s profile.) |
Sales Location |
Sales location. (The default comes from the user's profile.) If this sale should be credited to a different sales department, delete the current value and click the LOV to select a new one. |
6. Click Next.
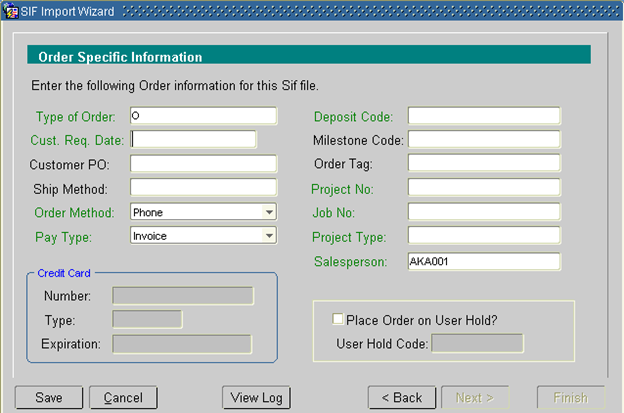
7. You are now in the Order Specific Information screen. The fields below enable you to enter more detailed information relating to this quote.
Type of Order |
This field already contains an ‘O’, and shouldn't be modified. |
Customer Request Date |
Date the customer expects to receive the product. |
Customer PO |
If the customer associated with this order requires PO to process it then this field becomes mandatory. Enter that PO number here. |
Ship Method |
The information in this field defaults from the Contacts Management customer information. You may modify this. |
Order Method |
This value defaults to FAX. If that's not the appropriate order method, choose another one from the LOV. |
Pay Type |
This information defaults from the Contacts Management customer information. You may modify this field. If the Pay Type is Credit Card,the following fields need to be completed: |
Number |
Credit card number (without hyphens). |
Type |
Type of credit card (select from the LOV). |
Expiration |
Card’s expiration date (format MM/DD/YYYY). |
Deposit Code |
If the entry for this customer in the Contacts Management customer information is set to require a deposit, then this field becomes mandatory (select from the LOV) |
Milestone Code |
If this is a scheduled order, select the appropriate milestone code. |
Order Tag |
Optional. May contain a pre-determined internal order reference. |
Project Type |
Select the appropriate Project Order Type code using LOV. |
Project No |
Only projects already defined for this customer will appear in the LOV. Should a project not yet exist, one needs to be created. See the document — Copy Live Project From the Appropriate Model. |
Job No |
Default job number later assigned to this order. For a new project order or quote, choose from the LOV. |
Place Order on User Hold? |
Check this box to put this order on hold. |
User Code Hold |
If you did check the Place Order on User Hold box, select the appropriate hold code. |
8. Click Next.
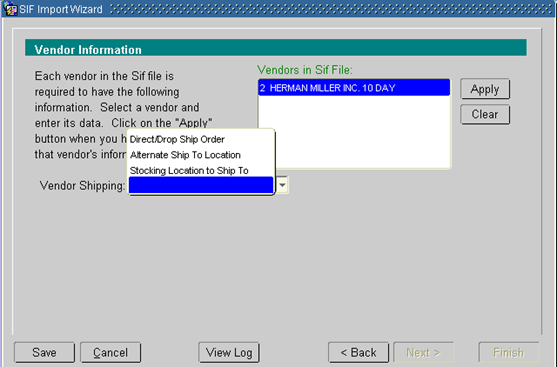
9. You are now in the Vendor Information screen. Each vendor listed is represented in the .sif file used for this order. The system requires that you populate these fields for each vendor:
Vendor Shipping Informs the vendor where to ship this order. If left blank, the system will use the stocking location defined for the customer or the user.Optional.Select an entry from the LOV:
Direct/Drop Ship Order Ship the product directly to a customer location (i.e., the Ship To Location selected previously).
Alternate Ship To Location When selected, two fields appear – Vendor No and Vendor Loc, which should contain the vendor # and location to which the product from this vendor will be shipped.
Stocking Location to Ship To When selected, an additional field appears – Stocking Location,in which you need to select the location that will be receiving this order.
10 Once you've entered the first vendor's information, click Apply and repeat step 10 for the next vendor listed. Continue until all vendors displayed have the word ‘Done’ after them.
11. Click Next when all the vendors’ information is complete.
12. You are now in the Create the Order screen, which enables you to update the order process in Khameleon.
13. Click Build Order to begin the process.
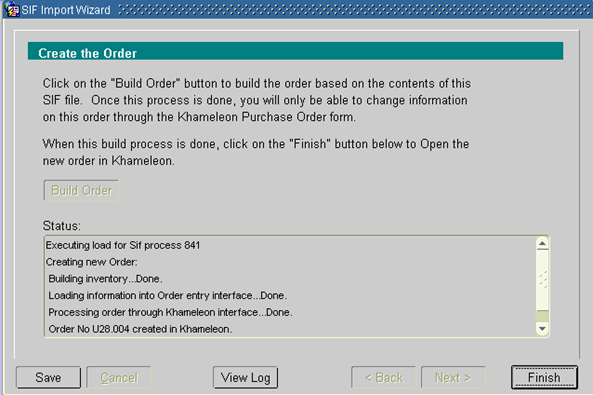
14. The status of the order building process will be displayed in the text box. Before clicking Finish, note the order number, which you'll need for the next step. When you click Finish, you will be returned to the menu.