From the Main Menu, go to Projects\Project Orders\Processing\Invoicing\Generate Invoices
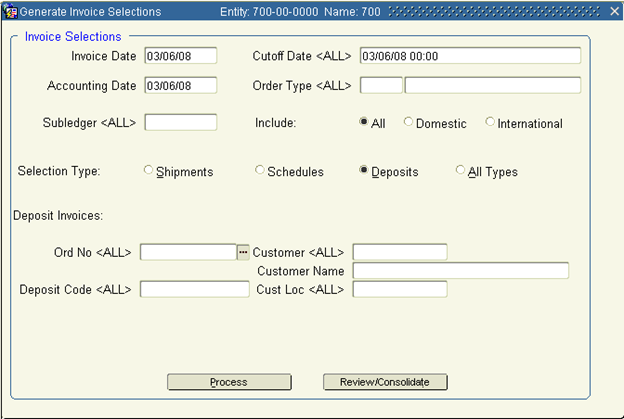
1. Type the information in the fields below, or select the appropriate entry from the LOV.
Tab to move from field to field. (If a field exists on your screen, but you don't see the entry below, then leave that field blank.
Invoice Date Defaults to the current date. The Invoice Date on the Review/Consolidate screen overrides this date.
Accounting Date Defaults to the current date. The Accounting Date on the Review/Consolidate screen overrides this date.
Sub-ledger Always leave blank for all sub-ledgers.
Cutoff Date Cut-off date/time for generating invoices. Use military time (format mm/dd/yy/hh:mi).
Order Type Always leave blank for all order types.
Include Select the All Types button.
Selection Type Select the Deposits button.
Deposit Invoices Use one or more of the options below to further specify which invoice(s) to generate. In each instance, leaving the field blank constitutes “all” of that selection.
Ord No
Deposit Code
Customer
Cust Loc
Note: If you have chosen to require the order number during invoice selection, you must assign the order number for deposit invoices.
2. Click Process to generate the invoice(s) based on the specified criteria. The system prompts you to click OK to complete the process, and then notifies you that it is successful.
3. Click Review/Consolidate. A batch will be created to print.
Print the invoice(s)
1. Once the invoice has been generated, you may print it.
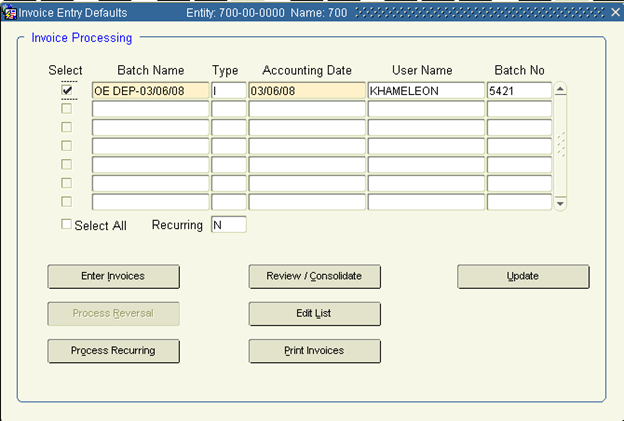
2. Click the Select box to the left of the batch you wish to print.
3. Click the Print Invoices button.
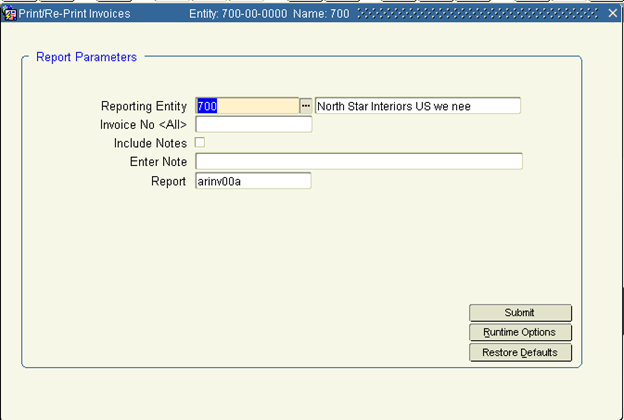
1. All invoices in the batch(es) selected will print. You may choose a new Report style if you wish. Click Submit
2. Invoices will print to PDF. You may print, email or save. Close the PDF when finished.
3. After your invoice(s) print(s), Return to the Review/Consolidate workbench.
Update the Invoice
Assuming the printing of the deposit invoices was acceptable, now you should update the invoice batch so that the Detail and Summary Information may be viewed in Aging Reports and the Customer Balances – Aged window. Once updated, you can no longer make changes or print the entire batch of invoices.
1. Check the Select box that corresponds to the audit numbers you want to post. Check the Select All box to post all displayed batches.
2. The system reminds you it's about to post the batch you've chosen. If ready, and correct, click OK. Once the process is completed, you will no longer see that particular batch entry on the Invoice Posting screen.
The invoices are now ready to post to the General Ledger. The GL Interface Unposted Transaction Detail Report enables you to review the information in an updated AR batch before it’s posted to the General Ledger module.
3. Exit the form.