From the Main Menu, go to Distribution\Inventory\Maintenance\Inventory Items\Item Master
The Khameleon application allows for the kitting or bundling of items under a single parent item. There are a variety of uses for kit items, but in most cases the intention is bundling like items so that they can be sold together under a single item heading. This concept applies to both tangible item kits as well as service, or labor item kits. In either case, when building kits – both the parent item and all component items must currently exist in the item master.
Note: The Kit Flag within the item master is not populated or updated by the end user, rather the kit flag is set by the application once an item is used in the screen below as the parent item of a kit. Items created for use as a kit parent item or kit component item are set up no differently than standard items.
For additional information on the set up of standard material, labor, or expense (service) items, please see the related section within this document.
Once both the parent and all components have been defined at the Item Master, kits are built at Distribution\Inventory\Maintenance\Set Up Kits and Components.
From the Main Menu, go to Distribution\Inventory\Maintenance\Set Up Kits and Components
In the upper block, use the list of values to select the item to be used as the Parent Item of a Kit. Set the Config? Flag to checked if you wish for the end user to have the ability to expand and configure this kit during the Order Entry process. It is almost ALWAYS required that the end user have this capability in order to effectively use the kitting functionality.

Tab down into the lower block section of the canvas. Use the list of values to select the component items which should always be included within the kit currently being built. It is required to also define the default unit of measure, the default quantity of the component item when presented within this kit, as well as the default price of the component item when presented within this kit. Note that the default unit cost of any component item when used within a kit will follow the standard logic where the cost defined at the highest ranking vendor item is the cost used within Order Entry.
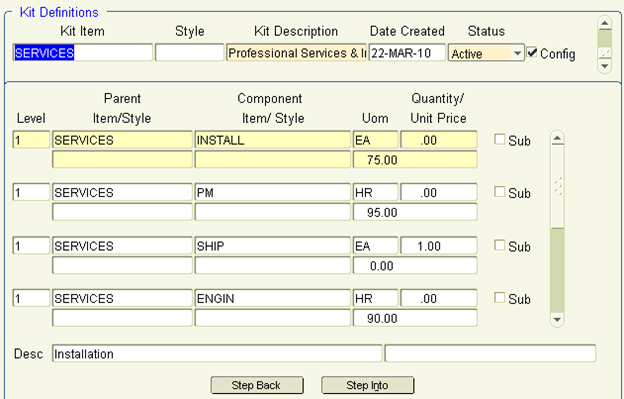
The Sub? Flag within the SetUp Kits and Components canvas does not indicate whether an item is subcontracted, rather it indicates whether substitute items are allowed.
The Step Into and Step Back buttons are used to facilitate multi-level kits if desired.
Once all component items are defined, the kit item is ready for use within Order Entry.
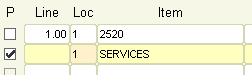
From the Lines tab of a sales order or quote, navigate to the next available line and either enter, or use the provided list of values button to select a kit parent item. Upon selection or entry, tab through the available fields and populate a value for Quantity.
Note: If entering a quantity of greater than one, it is important to recognize that the default qty values will be multiplied by the value entered for quantity at the parent item.
Once a kit item is selected within the Sales Order Lines canvas, the P checkbox on the far left is checked to indicate that this line item is a ‘P’arent line with components underneath it.
Tabbing through the Quantity field, the user may be prompted by the alert below if not using Price Lists.
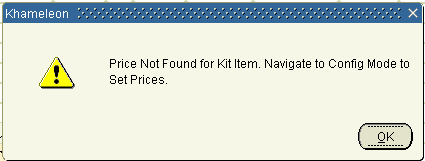
This alert indicates that the cost and price of a kit item cannot be updated or entered at the parent item level, rather, the user must click the Config-On button in the lower left and set the individual qty, cost, and price of each component item according to requirements.
When the Config-On button is clicked, the all non-kit items are removed from the canvas viewport, and the component items are expanded downward from the parent to show detail.
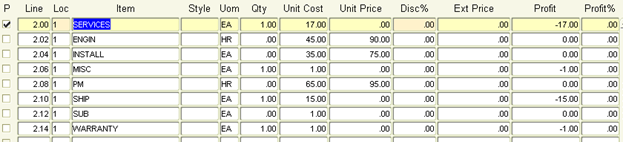
The default values for qty and price are based on how the kit was built in the Set Up Kits and Components screen, and the default cost, as with standard items, comes from the highest ranking vendor record tied to the item.
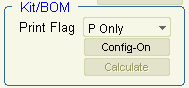
Once all component items have been configured with quantity, unit cost, and unit price – the Calculate button in the lower left can be used as a preview measure to see how each line will calculate out and contribute to the overall parent level unit cost and unit price. The Config-Off button can be used to shrink the item back upward to its presentation as a single line item.
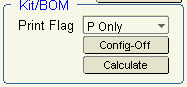
The Print Flag in the lower left can be used to control how kit items are displayed on Quotes, Order Confirmations, and Invoices, as follows:
P Only Display the Parent Line Item Only
PAmt and C Display the Parent Line w/Parent Pricing, Display component item & qty
P and C Amt Display the Parent Line w/o Pricing, Display component qty and pricing
Note: If using kits to build a Services bundle and also using the Auto-Ship Service Items feature, ALL component items need to be fulfilled in order to auto-ship as designed. Component items, if set up as service items, can be filled within the line detail tab while the Parent kite item is in Config-On mode.
Kit items can also be built ‘on the fly’ in the Sales Order Lines canvas by selecting a standard non-kit line item from the item master, tabbing through to indicate a quantity, and then clicking the Config-On button in the lower left. Naturally no predefined component items will be present on screen, though the user can then specify any number of components that they want to tuck under the parent item initially selected.
**Critical Note** All component items must be fulfilled before Khameleon will ship the ‘Kit’ item.