Vendor Types:
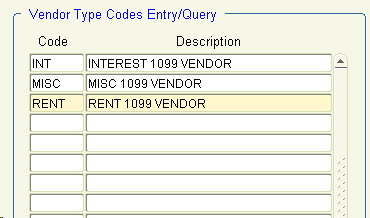
1. It is recommended that you set up your vendors that are 1099 related with type codes per the below list that you can define in Accounting\Accounts Payable\Maintenance\Codes\Vendor Types. This will allow you to run summarized reporting in Khameleon for the 1099 information for your vendors. It also allows you to capture all payments made to your vendors especially if you forgot to make them a 1099 vendor prior to making an actual payment.
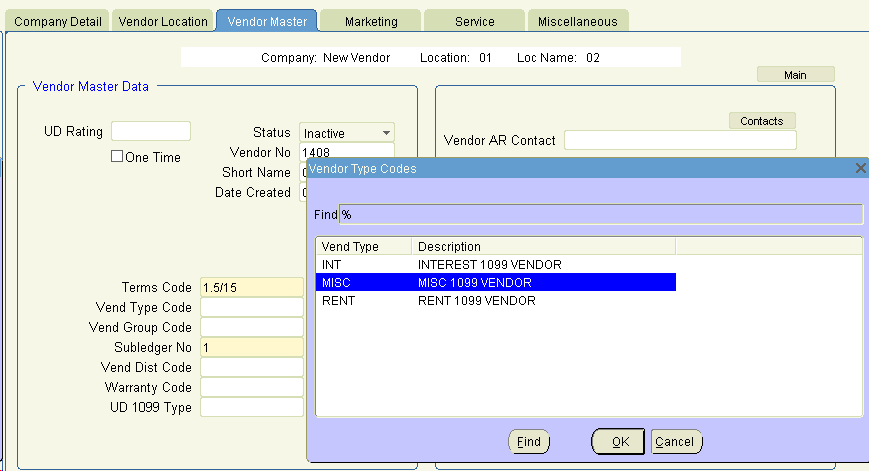
2. In Accounting\Accounts Payable\Maintenance\Vendor Master select your vendor to add a vendor type to. On the Vendor Master tab click in the Vend Type Code field and select a code from the list of values. Click the OK button and Save the change.
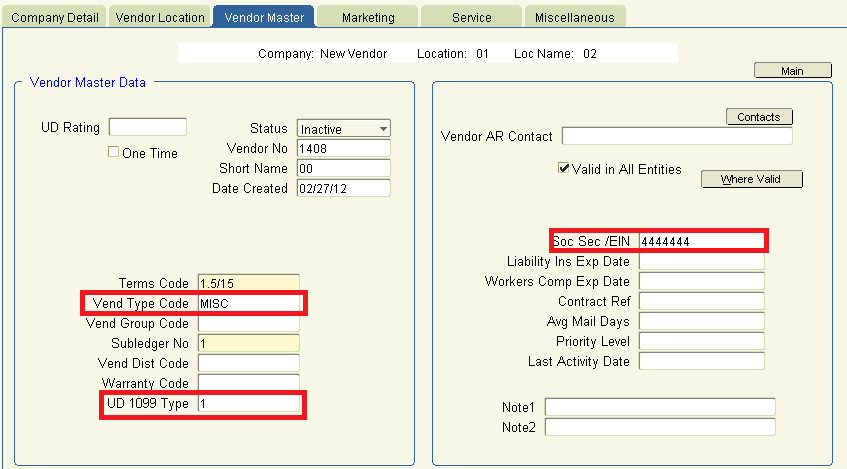
3. Also validate the UD 1099 Type field has the correct 1009 code in it and the Soc Sec / EIN # is populated for the vendor in the vendor master tab.
This register allows you to review your vendor list to make sure you have all vendors coded for 1099s.
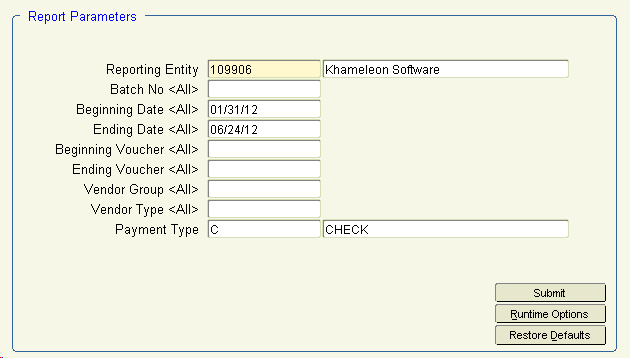
From the Main Menu, go to Accounting (Application)\Accounts Payable (Module). From the menu options across the top, go to Reports\Voucher History Reports\Detail Voucher Register.
6. From the menu options across the top of the Accounts Payable menu, go to Reports\Listings\Vendor List. Click Submit.
Use Vendor List report to look for any 1099 vendors who do not appear on the Detail Voucher Register Report above. If you find one, you will need to refer to the Vendor Master setup above to add the vendor as a 1099 vendor on the Vendor Master tab. If the vendor is set up correctly but did not have payments this year, you may continue on to the next step. If it is not set up as a 1099 vendor and should be then on the Vend Mstr tab of the contact menu select the appropriate 1099 code in the UD1099 Type field. You can then re-run the detail voucher history report above to capture all new information.