Project budgeting is optional and allows for reporting on budget vs. actual at the Project/Job level.
Project budgets can be built from OE Sales Order lines and/or entry directly into PA budgets labor and expenses outside of OE Sales Orders
OE Project Sales Order budget information can be automatically inserted and updated in PA budgets with the following setup.
1. Go to Distribution/Sales Orders/Maintenance/Controls/Control Record. In the top right corner of the window is a More button. Click the More button. Check the box for ‘Auto Create PA Budget during Project Order Confirm’. Save and exit.
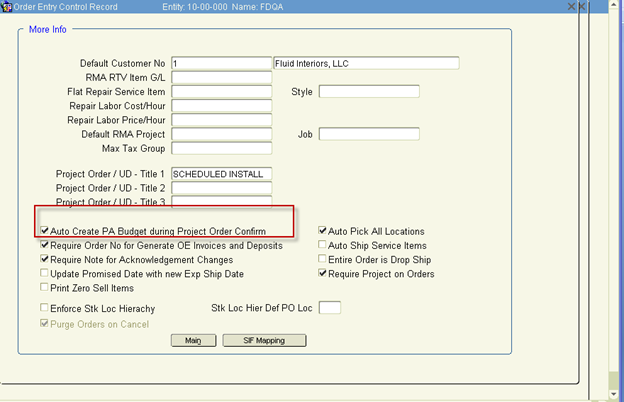
2. This setting defaults the ‘Create PA Budget’ check box to on in the Confirmation Details screen and can be changed during the Confirmation process for an Order you may chose not to budget or vice versa.
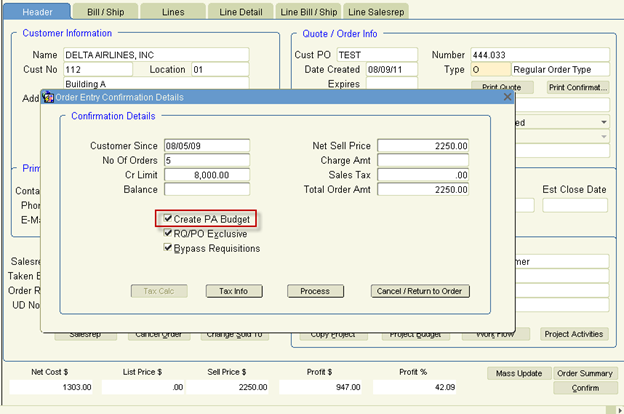
The program logic will then look at the records in OE Line and insert/update PA Budget for the Project associated to the Project Sales Order. See example below.
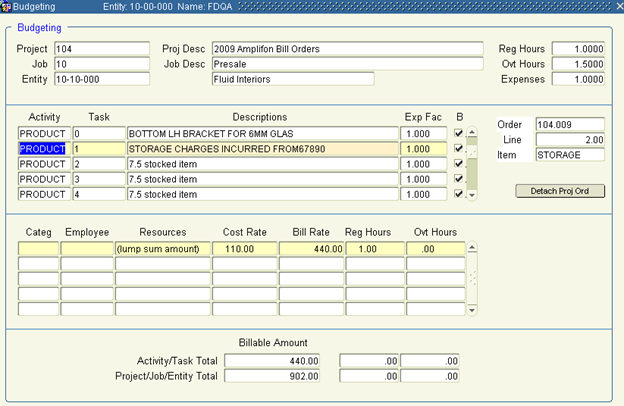
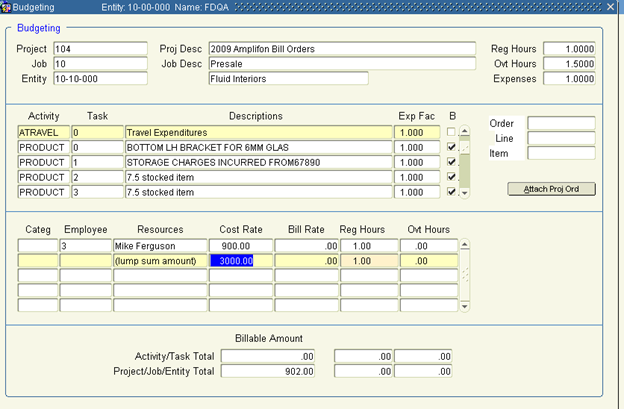
The above screen can also be used to enter budget information directly. All project/ job / Activities data will auto-populate when you Query a project into the 1st block. The 3rd Block will auto-populate budget data that came over automatically from the Project Sales Order (assuming Create PA Budget was turned on). Budget data can be manually entered / updated for any Job/Activities that exist on the project. If you are setup to create budget data from Project Sales Order, you still might want to budget for non-Project Order Activities such as pre-sales labor or travel expenses.
1. Access this screen from Projects\Project Accounting\Processing\Budgeting. Navigate to the 2nd block and select the Activity to enter/update budget data and then navigate to the 3rd block.
2. Information entered in this block can vary depending on Activity type is being budgeted. For labor you could do lump sum budgeting for Employee Categories or you can budget down to the individual employee. The example below shows two budget lines. One down to an individual employee and one Lump Sum.
Note: The Reg Hours column is also used for Quantity when budgeting non labor Activities.
3. Go back to 2nd block and select the next Activity you want to budget. Continue until complete. You can save and exit the screen at any time and return to review, add or modify.