From the Main Menu, go to Distribution/Purchase Order/Processing/Purchase Orders/Reprint Selections.
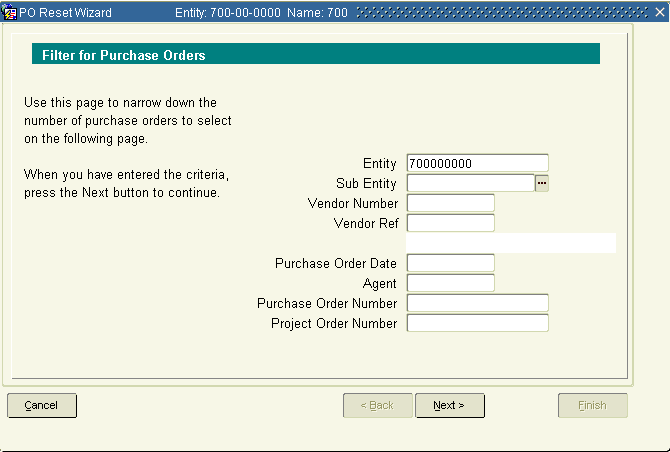
You may leave any of the following fields blank to “select all”:
1. In Sub Entity, select your specific division from the LOV.
2. Tab to Vendor Number and enter the vendor number or select it from the LOV.
3. Tab to Vendor Ref and enter the vendor reference number, or select it from the LOV.
4. Tab to Purchase Order Date and enter the date.
5. Tab to Agent and select it from the LOV.
6. Tab to Purchase Order Number and enter the PO or select it from the LOV. (We recommend you select one at a time to reprint.)
7. Tab to Project Order Number and enter the number or select it from the LOV.
8. Click Next. This brings you to the screen — Select the purchase orders you want to reset.
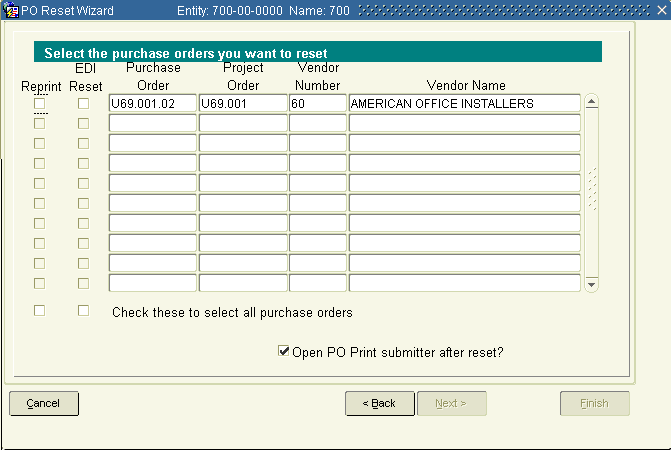
9. Check the Reprint box next to each purchase order that you want to reprint. Check the box at the bottom of the column to select all purchase orders to reprint.
10. Check the EDI Reset box next to each PO you want to resubmit. Check the box at the bottom of the column to select all purchase orders to reprint.
11. If you leave the Open PO Print submitter after reset? box checked…Click Finish. A message appears — Are you sure you want to reset/reprint these purchase orders? Click Yes. You will be taken you to the Print Purchase Orders screen.
If you uncheck the box, you will be returned to the Purchase Order menu.