This form is used to associate manufacturer catalogs to a vendor in Khameleon. The information defined here is used to populate order information for items coming from a SIF file.
From the Main Menu go to CRM/ Contacts Management/ Maintenance/ Company/ Vendor Cross Reference
You may click ‘Qualify Search’ to query by Vendor No or Vendor Name, or click ‘Get All’ to retrieve all vendors and their associated catalogs.
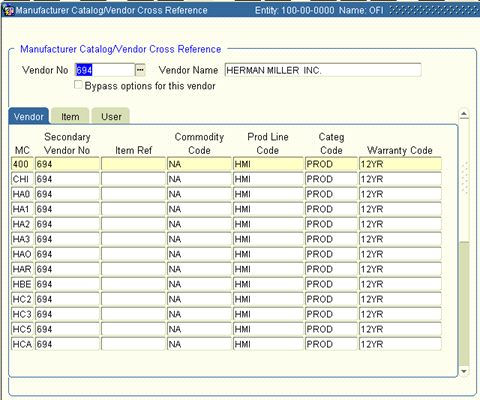
1. For the Vendor displayed, define the following:
Bypass options for this vendor This allows you to define whether to place option codes and descriptions in the line item ‘Notes’ field. This allows for easy modification for those vendors who do have EDI capabilities.
MC Enter the Manufacturer Catalog code assigned for this Vendor.
Secondary Vendor No Future functionality. Required. Re-enter the Vendor Number.
Item Ref Optional. Enter a user defined reference/short name for items from this catalog.
Commodity Code Select a defined Commodity Code using the LOV.
Prod Line Code Select a Product Line Code for items from this catalog using the LOV.
Categ Code Select a defined Category code for items from this catalog.
Warranty Code Select a previously defined Warranty code for items in this catalog.
2. Click the ‘Item’ tab and define the following for this catalog:
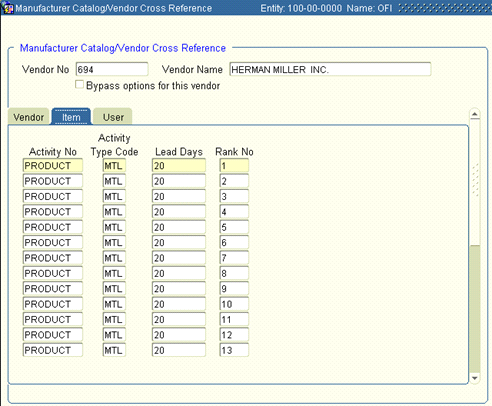
Activity No Select the activity associated with the items in this catalog. Typically, this is ‘Product’.
Activity Type This is a display field based upon the Activity Number that was selected.
Lead Days Enter the Lead Time days for items in this catalog. This is a default when items are purchased that's overridden.
Rank No Leave blank.
3. The values on the ‘User’ tab are not used at this time. Click back on the ‘Vendor’ tab and click ‘Save’.
4. Create a new catalog record. Enter all the catalog for the selected vendor.
5. Click back to Vendor No or Vendor Name when finished.
Click the Query button to query another Vendor. Repeat these steps for any catalogs to define
Note: Vendor Cross Reference records cannot use the function to bypass options for a vendor.

Go to CRM/ Contacts Management/ Maintenance/ Company/ Vendor Entity Information
This form is used to define data used in the PO creation and EDI process to communicate required information to a vendor.
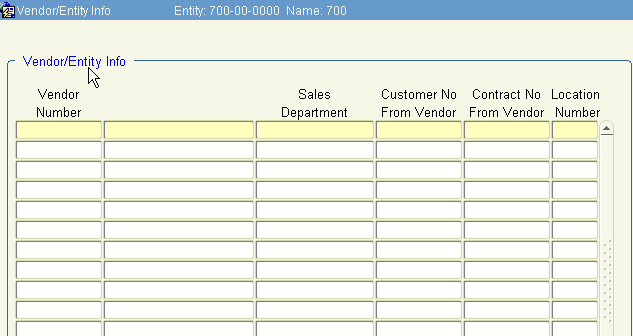
Note: This is a maintenance form and does not display existing records unless queried.
Vendor Number Enter the Vendor Number for the EDI vendor. The name will display to the right.
Sales Department Select the Sales Department this record is for. Records must be defined for each Vendor/Sales Department combination.
Customer No from Vendor This is your customer number with the selected vendor, for the defined Sales Department.
Contract No from Vendor If this vendor has a special pricing contract number, enter your default number.
Location Number Select a default Inventory location.
Save and Exit.