From the Main Menu, go to CRM\Service Desk\Processing\Incident Queue
Incident Queue
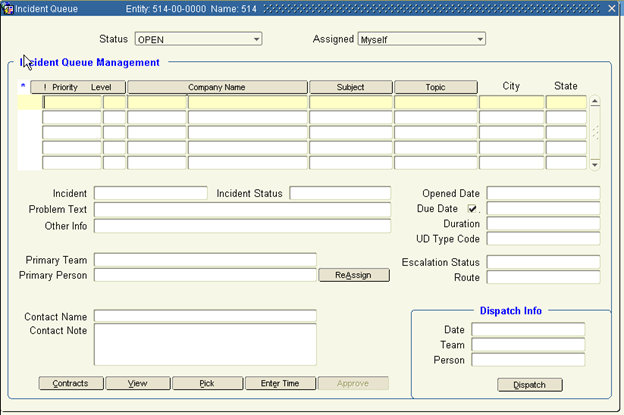
The screen initially displays the incidents assigned to the current user that are open. Other incident can be queried. Change the Status and Assigned drop downs as appropriate. Put the form in query mode and then use the fields on the form to query as desired.
Highlight the line of the incident to be reviewed.

Select one of the buttons on the screen:
Reassign |
Assign the incident to a different person/team |
View |
Go to the incident details screens. This function allows the user to view the details, but not update any fields. This button does not affect who is assigned to the incident. |
Pick |
Go to the incident details screens. This function allows the user to view the details and update the fields within an incident. This button reassigns the incident to the current user. |
Enter Time |
Takes the user to a time entry screen, so time can be entered against the incident |
Dispatch |
Sends email to user/team selected. (Email notifications have to be configured.) |
Selecting View or Pick will bring up the Incident Detail tabs.
Header |
Displays the service location and contact information |
Detail |
Contains the bulk of the incident information. Here the priority level, items assigned, contract assigned and customer PO can be updated. This tab also includes the sales order field to link the incident to an order or click the Incident Orders button to create a new order. |
Assignment |
Displays who is assigned to the incident and to whom the incident has been dispatched. Here the incident can be reassigned or dispatched. |
Resolution |
Contains the fields to indicate an incident is resolved and close the incident. (See Closing an Incident section for more details.) |
UD Fields |
User defined fields to capture additional information regarding the incident. |